Switches
Logo button = Functional switch Plus Button = Increase output level Minus Button = Decrease output level
On/Off
Press and hold the functional switch for 0.5s to turn on the light, press and hold again for 0.5s to turn off the light.
Output Selection
- With the light switched on, press the “+” switch to increase the output level to the highest the battery level supports.
- With the light switched on, press the “-” switch to lower the output level to the lowest output level.
Flash
With the light switched on, double click the functional switch to enter flash mode; single click the functional switch again to exit flash mode.
Remote Pressure Switch
Switches Square Button = Pressure switch Bolt Button = Instant Turbo
On/Off
Press and hold the pressure switch for 0.5s to turn on the light, press and hold for 0.5s again to turn off the light.
Output Selection
- With the light switched on, single click the pressure switch to cycle through Low→Med→High→Turbo.
- In any status, press instant turbo switch to activate 1800 lumens, which will last up to 20s. Upon release the light will return to the previous status.
Battery level Indication
With the light switched off, single click the functional switch to check the battery status. The OLED screen will display the battery status percentage, and then goes out in 5 seconds. One: 25% Two: 50% Three: 75% Four: 100%
Charging
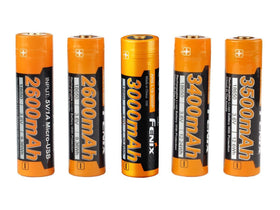
- Use the included standard Micro USB charging cable and an adaptor above 5V/1.5A, or the charging time will be prolonged.
- While charging, the OLED screen will display a charging icon, and current battery level will be displayed. The battery full icon will be displayed and the three switches will remain green when the battery is fully charged. The normal charging time of the built-in battery is 3 hours from fully depleted to fully charged with the light off.
- Once charging is completed, be sure to remove the charging cable and replace the dust cover.
Note:
- Recharge the light timely when the battery level is critical, for future use.
- Recharge a stored light every three months to maintain optimal battery performance.
- Only Low output can be used while the light is being charged, and charging time will be prolonged.
Anti-theft Protection
On/Off
With the light screen is on, simultaneously press and hold the “+” and “-“ switches for 1s to turn on the anti-theft alarm. A distinct “DI” means the function is activated successfully.
Note:
- When turning on/off the anti-theft alarm, make sure the security key is inserted in the remote pressure switch and the remote pressure switch is connected with the bicycle light, otherwise the alarm will not be activated/deactivated.
- Turn off the anti-theft alarm before unplugging the remote pressure switch to avoid accidental activation of the alarm. If the alarm is accidentally activated, plug in the remote pressure switch to turn off the alarm.
Enter/Exit
- With the anti-theft alarm turned on, 3s after the security key is removed the bicycle light will enter anti-theft status, and any movement of the bicycle light will activate the alarm (100-110db). Plug in the security key to deactivate the alarm; the bicycle light will exit the anti-theft protection automatically.
Note: If the security key is lost, turn on the bicycle light and simultaneously press and hold the “+” and “-“ switches over 15s. In case of loss of the security key, contact the manufacturer to obtain a new key.
Intelligent Memory Circuit
The light memorizes the last selected brightness level on General mode. When turned on again the previously used brightness level will be recalled.
Low-voltage Warning
When the voltage level drops below a preset level, the bicycle light is programmed to step down to a lower brightness level until Low output is reached. The functional switch will flash red when the runtime of Low output level is less than 10 minutes.
Overheat Protection
The light will accumulate a lot of heat when working on Turbo mode. The light will automatically step down to a lower brightness level to reduce the temperature, but turbo mode can be reselected.
Mounting Instruction
Bicycle light and remote pressure switch
- Open the rubber seal of the light and plug in the remote pressure switch.
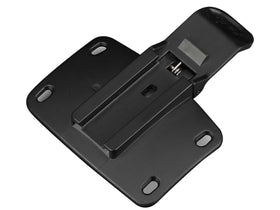
- Loosen the screw of the bike mount. Fix the bike mount in the desired position on the bike handlebar and fasten the screw.
- Loosen the fine adjustment screw of the handlebar mount before clamping the mount to the bar by securely tightening the set screw. Slide the light into the mount until a distinct “click” is heard.
- Fasten the cable of the remote pressure switch to the desired position on the bike handlebar.
Note:
- Adjust the direction of the light before testing the power and functions of the bicycle light.
- Use the shims provided according to the diameter of the bicycle’s handlebars:
- Thick + thin shims together: diameter 22-28mm;
- Thin only: diameter 28-32mm);
- No shim (whenever applicable): diameter 32-35mm.
Warning
- This light is a high-intensity lighting device capable of causing severe eye damage. Avoid shining the light directly into anyone’s eyes.
- The light will accumulate a lot of heat when working on Turbo mode. Do not touch the heat dissipation fins.
- The light features IP66 rated protection - can be used in rainstorms and smog, but do not immerse into water.
- Keep the light out of reach of children.
- Disassembling the sealed head can cause damage to the light and will void the warranty.
- For secure transportation, the bicycle light is not fully charged before delivery. Recharge it before first use.