Operating Instructions for the Bicycle Light
Switches
The Spotlight switch controls the Spotlight mode. The Floodlight switch controls the Floodlight mode.
On/Off
Press and hold the Spotlight switch for over 0.5 seconds to turn on/off the Spotlight mode.
Press and hold the Floodlight switch for over 0.5 seconds to turn on/off the Floodlight mode.
Output Selection
In Spotlight beam mode, single click the Spotlight switch to cycle through Low→Med→High.
In Floodlight mode, single click the Floodlight switch to cycle through Eco→Low→Med→High.
Lockout Function
Lock: With the light turned off and unlocked, double click either switch on the bicycle light within 0.5 seconds, the light will blink twice in Eco output of Low beam mode to indicate locked status.
Unlock: With the light locked, double click either switch on the bicycle light within 0.5 seconds, the light will enter the selected mode at its lowest output level to indicate the light is unlocked.
Operating Instructions for the Wireless Remote
Switches
- The Spotlight switch controls the Spotlight mode.
- The Floodlight switch controls the Floodlight mode.
- The functional switch controls the Wireless Remote mode.
Connecting with BC45R
- Press and hold either switch on the bicycle light for 5 seconds, and the OLED display will show “Connecting”.
- Single click any switch on the wireless remote, and the OLED display will show “Pair?”.
- Single click either switch on the bicycle light, and the OLED display will show “Connected!” to indicate that pairing is complete. Once paired, the wireless remote will automatically memorize the paired status. No re-pairing is required.
*The initial pairing process must be completed within 60 seconds, or it will cancel automatically.
Output Selection
- With the light turned on, single click the Spotlight switch to cycle through Low→Med→High.
- With the light turned on, single click the Floodlight switch to cycle through Eco→Low→Med→High.
- With the light turned on, single click the functional switch to enter Turbo; double click the functional switch to enter Flash. Single click any switch except for the functional switch to exit Flash mode and return to the previously used output level.
*If the battery is low while Turbo is on, it will light up with the highest brightness supported by the current battery level.
Sleep Mode
- Enter: With the light turned on, press and hold the functional switch for over 1.5 seconds; the bicycle light will go out, enter Sleep mode, and show “” on the OLED display. Single click any switch on the wireless remote switch or the bicycle light to wake up the bicycle light and enter the selected mode.
- Exit: Turn off the bicycle light with either switch on the bicycle light to exit Sleep mode.
*The bicycle light will automatically exit Sleep mode if no operation is detected for two hours.
OLED Display
- Turn on the bicycle light to activate the OLED display, which will remain constantly on to show the current brightness level, mode, and battery level.
- If only one battery is inserted, the OLED display will show .
*If the battery level is lower than 10%, the battery icon on the OLED display will blink to remind users to replace or recharge the batteries in a timely manner. Meanwhile, all brightness levels of the High beam mode are limited to 200 lumens, while those of the Low beam mode are limited to 50 lumens.
Intelligent Memory Circuit
The bicycle light automatically memorizes the previously used output excluding Flash and Turbo. When turned on again, the previously selected output will be recalled.
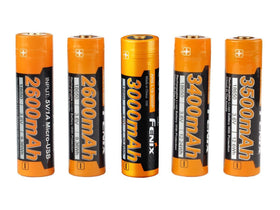
Battery Specifications
Type | Dimensions | Nominal Voltage | Usability | |
Fenix ARB-L18 Series | 18650 | 3.6 V | Recommended | √√ |
Rechargeable Battery (Li-ion) | 18650 | 3.6 V/3.7 V | Caution* | ! |
Rechargeable Battery (LiFePO4) | 18650 | 3.2 V | Banned | × |
- *Do not mix batteries of different types or ages. Doing so may cause damage to the bicycle light or the batteries being used.
- 18650 Li-ion batteries are powerful cells designed for commercial applications and must be treated with caution and handled with care. Using low-quality batteries or mishandling batteries (such as short-circuiting or overheating) could lead to combustion and jeopardize the safety of users and property. Any adverse effects resulting from the use of low-quality batteries are not covered by any Fenix warranty or liability. Using quality batteries with circuit protection will reduce the potential for combustion or explosion.
Battery Replacement
Bicycle Light
- Rotate the tail cap button according to the direction of the "OPEN" logo, and pull out of the battery case.
- Insert the batteries according to the polarity marks of the battery case.
- Insert the battery case into the light body, and after the battery case is flush with the light body, rotate the tail cap button in the opposite direction of the "OPEN" logo.
Wireless Remote
Insert the coin into the back of the wireless remote, rotate the coin counterclockwise to open the battery cover; and then insert the battery, and tighten the back cover clockwise.
*Replace the CR1632 button battery every 3 months to maintain the optimum performance.
Charging
- Turn off the bicycle light and open the anti-dust cover. Plug the USB Type-C end of the charging cable into the charging port of the bicycle light.
- The OLED display will show "" while charging and then show once charging is completed and the charging cable is unplugged.
- Once charging is completed, be sure to unplug the charging cable and close the anti-dust cover.
Note:
- The Eco, Low, and Med outputs of Floodlight mode and the Low and Med outputs of Spotlight mode can be activated while charging, but the charging time will be prolonged.
- Recharge a stored bicycle light every four months to maintain the optimum performance of the batteries.
- With the light turned off, the normal charging time of the included Fenix ARB-L18-3400 batteries is approximately 3.5 hours from depleted to fully charged with a 9 V/2 A charging adapter.
- The wireless remote cannot be operated while charging due to charging circuit protection.
- Power specifications:
- Charging voltage: 9 V
- Charging power: 18 W (9 V/2 A)
- This bicycle light supports fast charging.
- Only use a certified USB charging adapter that complies with the government safety standards of the country or region where this product is sold.=
Mounting Instructions for the Bicycle Light and the Wireless Remote
- Loosen the screw of the bicycle mount. Fix the bicycle mount in the desired position on the bike handlebar and fasten the screw.
- Hold the light and slide it into the mount until a distinct “click” is heard.
- Fasten the strap of the wireless remote to the desired position on the bike handlebar.
Note:
- Adjust the direction of the light before testing the power and functions of the bicycle light.
- Use the shims provided according to the diameter of the bicycle’s handlebars:
- Thick only: diameter 22-28 mm;
- Thin only: diameter 28-32 mm;
- No shim required: diameter 32-35 mm.
Intelligent Overheat Protection
The bicycle light will accumulate a lot of heat when used at high output levels for extended periods. When the bicycle light reaches a temperature of 55°C/131°F or above, it will automatically step down a few lumens to reduce the temperature. When the temperature drops below 50°C/122°F, the bicycle light will gradually recall the preset output level.
Low-voltage Warning
When the voltage level drops below the preset level, the bicycle light is programmed to downshift to a lower brightness level until Eco output is reached. When this happens in Eco output, the battery icon on the OLED display will blink to remind users to replace or recharge the batteries in a timely manner. To ensure normal use, the bicycle light will not turn off automatically, and the battery icon on the OLED display will keep blinking till the battery level runs out.
*This only works with a Fenix ARB-L18 Series battery.
Usage and Maintenance
- Disassembling the sealed head can cause damage to the bicycle light and will void the warranty.
- Replace or recharge the batteries in time to ensure normal use for next time.
- Fenix recommends using excellent quality batteries.
- If the bicycle light will not be used for an extended period, remove the batteries, or the bicycle light could be damaged by electrolyte leakage.
- Recharge a stored bicycle light every three months to maintain the optimum performance of the batteries.
- Long-term use can result in O-ring wear. To maintain a proper water seal, replace the ring with an approved spare.
- Periodic cleaning of the bicycle light and battery contacts improves the bicycle light's performance as dirty contacts may cause the bicycle light to flicker, shine intermittently or even fail to illuminate for the following reasons:
A: Poor battery level.
Solution: Recharge or replace the batteries.
B: The contact or contact point of the batteries or bicycle light is dirty.
Solution: Clean the contact points with a cotton swab soaked in rubbing alcohol.
If the above methods don't work, please contact the distributor.
Warning
- Do NOT place this bicycle light in the reach of children!
- Do NOT shine this bicycle light directly into the eyes of anyone!
- Do NOT place light head near flammable objects, high temperatures can cause objects to overheat and become flammable/ignite!
- Do NOT use this bicycle light in inappropriate ways such as holding the unit in your mouth, doing so could cause serious personal injury or death if this bicycle light or internal batteries fail!
- This bicycle light will accumulate a significant amount of heat while operating, resulting in a high temperature of the light shell. Pay close attention to avoid burns!
- Turn off and lock the bicycle light or remove the batteries to prevent accidental activation when the bicycle light is placed in a closed and flammable environment such as pockets and backpacks!
- The light sources of this bicycle light are not replaceable; so the whole light will need to be replaced when any one of the light sources reaches the end of its lifespan!